
Setup a Pond in your Yard
Inspiration was taken from www.thisoldhouse.com
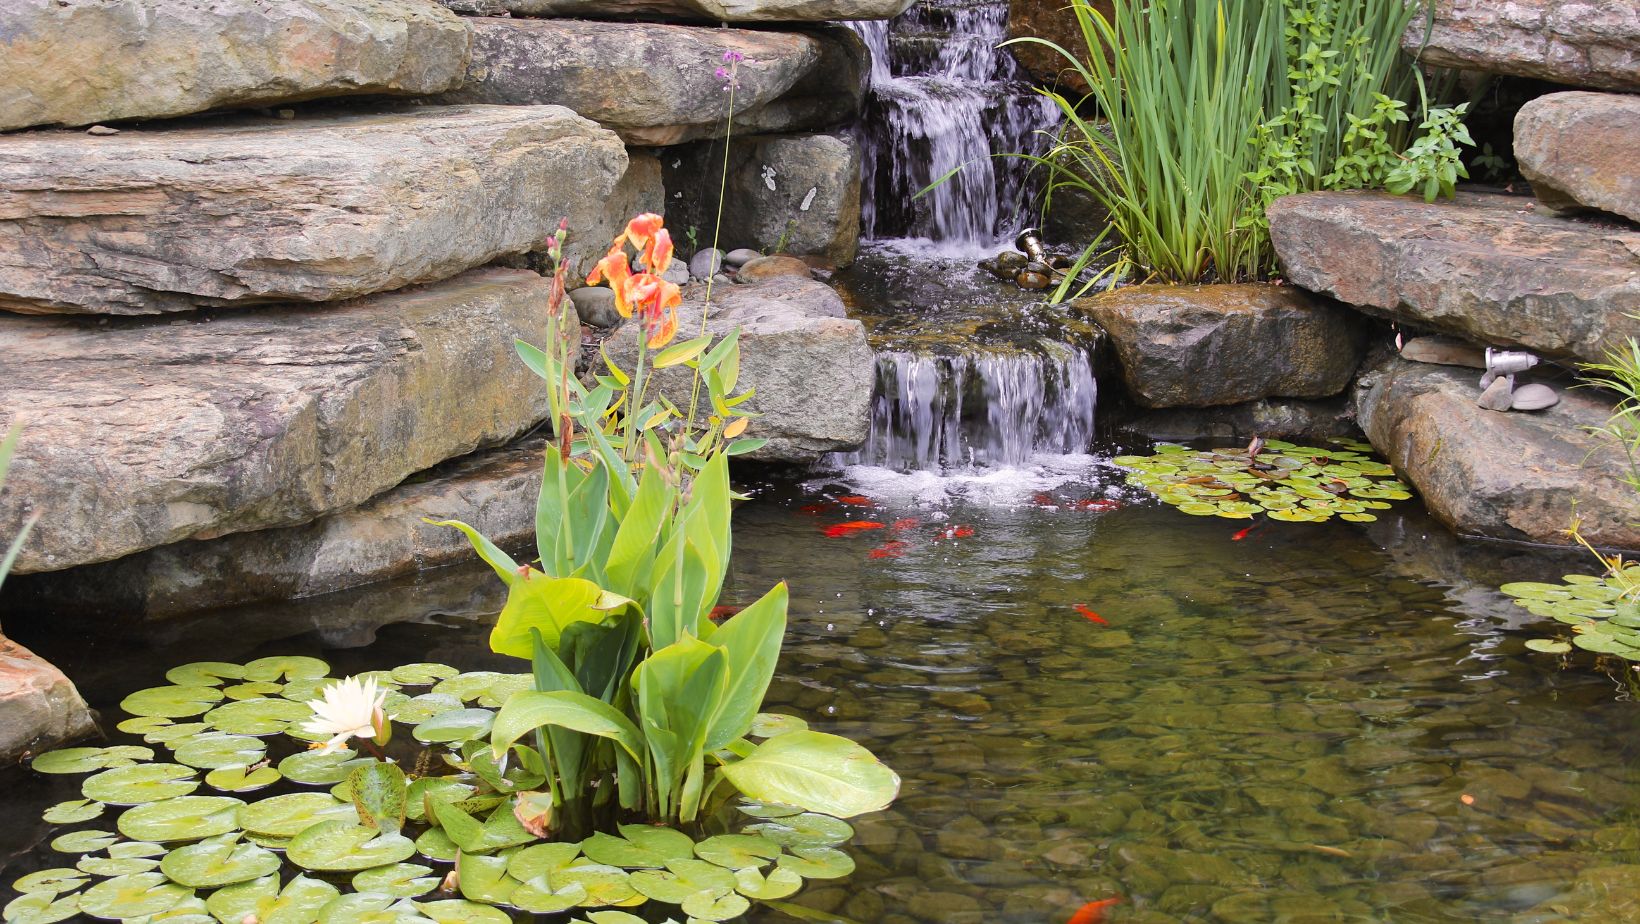
Pond Necessities
Dan Gibbon could have spent the last three and a portion of quite a while around Wisconsin's level farmlands, but the lapping waters of Lake Pervasive, where he grew up, were reliably extremely important to him. So, he got out the digging instrument and started making a pond. His soul mate, Gloria, had her inquiries ("I wasn't that stimulated with revealing the grass," she says). Nevertheless, her abhorrence melted away when she saw Dan’s compensation for all the difficult work.
Dan's pond attracts birds, frogs, butterflies, and crickets (no mosquitoes, in any case, in view of the moving water). It furthermore attracts Dan and Gloria. The couple oftentimes taste their coffees while watching the daybreak, and parlor by the mumbling water into the night. "My life partner is altogether blissful I did this," says Dan. "As am I — it's so loosening up."
Making a Pond in Backyard:
A free-form lake like Dan Gibbons can be changed for any scene, with different rocks, plants, shapes, and fountains. In any case, we'll give you a couple steady spotlights on position, size, and materials.
Where to Start
Before you start, call 811 or your local one-call concentration to have electric and gas lines stepped so you know where to dig to stay away from them. Then, when you map out the region of your pond, put it where it will be seen — observable from a window, off a yard, or along a walkway — yet away from the play areas of small children or pets.
Avoid critical underground roots or mature trees, which can discourage a great deal of the sunshine plants and fish need. You'll similarly ought to be reachable for a grounded external power source so you can interface a siphon, a key instrument for keeping the water coursed air through; most siphons go with the biggest line length of 25 feet, and electrical ropes are not recommended. You could need to cover the power several slithers down in PVC line to disguise it.
Space permitting, you need something like 40 cubic feet for your pond — around 7 feet by 4 feet — to keep the water clean. A hidden shallow yard just inside the boundary of the pond holds shakes that cover the liner edge and keep it set up. Second, further yard maintains plants that live in the water and help with changing the pond's current circumstance.
As you dig, you ought to incline the sides of the pond so that expecting that the water freezes, the ice will push up instead of against the liner. To be sure, even in more sizzling conditions, little lakes can change temperature rapidly, so expecting that you're adding fish you'll require a more significant lake that will keep a more unsurprising temperature and oblige the fish — 18 to 24 jerks for goldfish and something like 3 feet for koi.
Additional materials
To stay aware of the consistent significance of the water, you need to line the lake. A humble layer of sand and old papers or burlap packs loosen up the harsh edges of rocks and roots. However, over that, you ought to put waterproof skin.
There are a couple of sorts of versatile liners suggested for little lakes — created utilizing polypropylene and EPDM, among various materials. Look for one that is environmentally safe, so it will face UV radiates and bone chilling temperatures. It should moreover be assessed "fish-protected" in case you mean to stock your pond and go with an assurance of 10 to 20 years so your pond will be watertight from now onward, indefinitely.
Directions to Build a Pond: A Step-by-step Guide
Stage 1: Uncover the locale.
Design the size and condition of your lake with a rope or nursery hose. Using a spade, tunnel down 3 deadheads in a 1 broad ring outside the design to make the stone-line rack.
Then, at that point, make a plant yard by digging a 1 expansive rack 8 inches some place inside the rope outline. Simply dig the porch in areas where you expect to put plants.
Continue to dig inside the plant yard to make the bed of the pond — no less than 18 crawls down, with a slight inclination.
Stage 2: Level the pond's edges
Set a 2×4 across the uncovered opening and lay a level on top of it. By and large level the pond's edges. Then, at that point, cut out a 6 extensive, 1-inch-significant channel on one side to redirect flood.
Similarly dig a shallow channel to the nearest power plug for the PVC transmitter, which will hold the siphon line.
Stage 3: Set up the base.
Beginning in the point of convergence of the opening, convey a 1-inch layer of sand around the entire base and on the terraced racks.
Cover the sand and the sides of the opening with a ½-inch-thick covering of paper to give a cautious layer under the covering.
Smooth the entire surface the most difficult way possible and dispose of any roots or stones that could enlarge through the covering.
Stage 4: Line the pond
Cut a piece of liner to be something like 4 feet greater and longer than the lake.
Center the liner over the opening so there are 1 to 2 feet of overflow on one side and the rest of the excess is running against the norm side.
Set two stones on the more restricted excess to hold the liner set up. Beginning at this end, press the liner down along the inside edge and a while later along the lower part of the opening, working your methodology for getting around the lake.
Smooth out kinks and cross-over and push the liner solidly into opening.
Stage 5: Fill the pond.
Using a nursery hose, fill the pond with water. As it fills, industriously pull the liner tight on each side. On the off chance that central, have an accomplice pull from the alternate way.
Fill the pond until the water shows up at the top line rack.
Stage 6: Present the siphon.
String the siphon's line through a fragment of PVC course cut to length. Place the PVC course in the channel and top off the soil.
Hold one completion of the reusing hose as you set the direct in the most significant piece of the opening.
Stage 7: Make a stone line.
Fill the flood channel with pea rock for leakage.
Put together level rocks along the limit so the liner's edge is covered at this point something like 33% of each rock looms over the water.
Then, cover this first ring of rocks with an ensuing one. Paralyze the wrinkles between the stones and put them in a challenging situation from the edge of the essential ring a bit. Arrange and alter the stones until they sit in an interlocking position. Attempt various things with your branch-off until you have a trademark, staggered look.
Stage 8: Secure and cover the hose.
Where the hose leaves the water, wedge it between two rocks without crushing it. Conceal it with a third stone. Sort out and help the hose through the stones and over a stack to arrange the fountain.
At the point when the siphon and hose are secure, plug the string into an external GFCI power source. Watch the water stream and guarantee it looks typical leaving the hose yet spills by and by into the lake.
Stage 9: Scene your pond
Add plants in and around the pond. Keep the direct on during daytime hours yet shut it off around night-time so it doesn't attract evening animals.
Leave a comment